GoPro Settings For Mountain Biking: Get The Best Video!
Hitting the trails on your mountain bike? All set with your GoPro to capture the expected intense, cinematic, and true-to-life MTB biking footage? Yet, a few changes in the GoPro settings for mountain biking can be a cherry on the cake, you know!
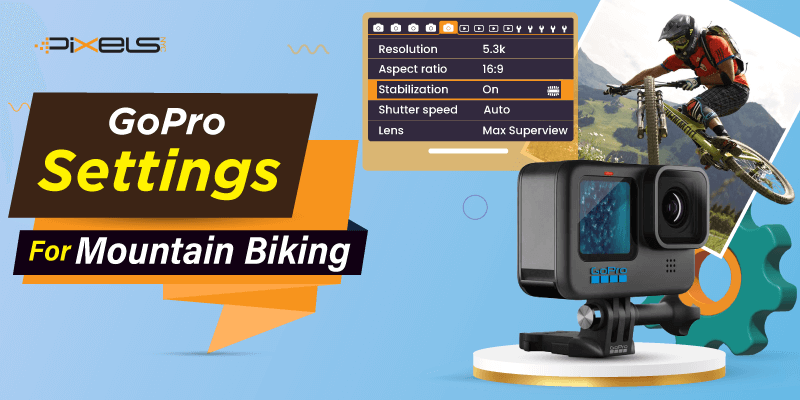
For instance, for mountain biking, GoPro camera settings to a resolution of 5.3k, frame rate 60, shutter speed Auto, color Natural, and so on can make a dramatic improvement. Moreover, there are also some Protune settings for GoPro’s advanced control.
Obviously, that’s not all! Check out today’s how-to guide for GoPro settings for capturing every amazing moment of your mountain biking adventure. So, come along for the mountain ride!
Best GoPro Settings For Mountain Biking

There is nothing worse than having to fiddle around with your camera on the mountain. Before you start your mountain riding, you should take a look at the settings of your camera. But which Gopro settings are best for mountain biking? Let’s get to know that.
Basic GoPro Camera Settings For Mountain Biking
There are a few basic biking shooting settings that anyone can use to get the best results with this action camera. Let’s start with the best basic setting that will go well with every GoPro camera.
| Resolution | 5.3k |
| Aspect ratio | 16:9 |
| Frame rates | 60 [In PAL region: 50] |
| Stabilization [HyperSmooth] | On |
| Shutter speed | Auto |
| Lens | Max Superview |
| ISO Max | 1600 |
| Sharpness | Medium |
| Color | Natural |
| Timer | Off |
| Hindsight | Off |
| Duration | No limit |
ProTune Settings For Advanced Users
Of course, nothing can go wrong with these settings, and you will definitely get good shots with this mountain biking camera.
But if you want to take the last bit of MTB video quality out of your GoPro, then you should make a few more changes in the ProTune settings.
| 10 bit | On |
| Bit rate | High |
| Shutter speed | Auto |
| EV Comp | Slightly negative [for instance -0.5] |
| White balance | 5500k |
| Sharpness | Low |
| Color | Natural |
| ISO Min | 100 |
| ISO Max | 6400 |
| Raw audio | Off |
| Wind | Off |
Other GoPro Settings For Mountain Biking
Where you are going to mount your GoPro camera while riding and have camera settings according to it, has a huge impact on how your MTB riding footage will turn out.
That’s why, here we have covered some of the settings of the GoPro camera on different mounting.
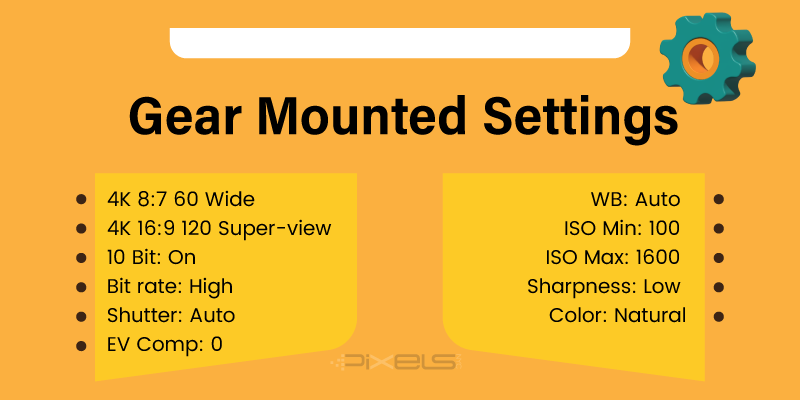
#1. Gear Mounted Settings

Here, the GoPro camera is attached to the bike frame for a unique hands-free alternative. It allows you to capture the in-action shots of MTB riding while staying concentrated entirely on your ride.
- 4K 8:7 60 Wide
- 4K 16:9 120 Super-view
- 10 Bit: On
- Bit rate: High
- Shutter: Auto
- EV Comp: 0
- WB: Auto
- ISO Min: 100
- ISO Max: 1600
- Sharpness: Low
- Color: Natural
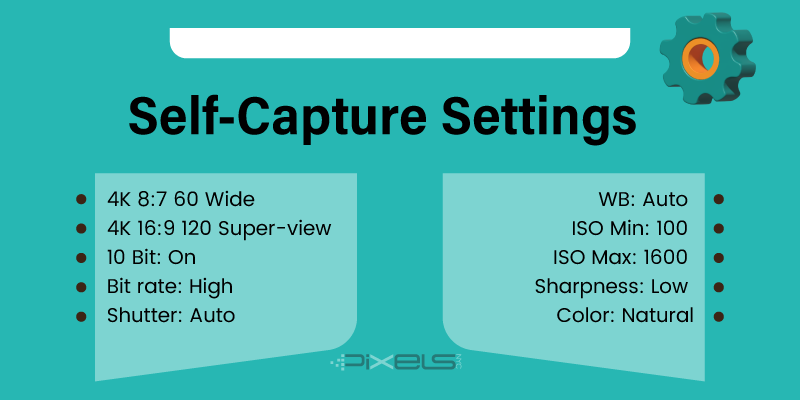
#2. Self-Capture Settings

When you want to capture epic selfies with GoPro while having an adventurous mountain bike ride, the settings can help you all.
- 4K 8:7 60 Wide
- 4K 16:9 120 Super-view
- 10 Bit: On
- Bit rate: High
- Shutter: Auto
- EV Comp: 0
- WB: Auto
- ISO Min: 100
- ISO Max: 1600
- Color: Natural
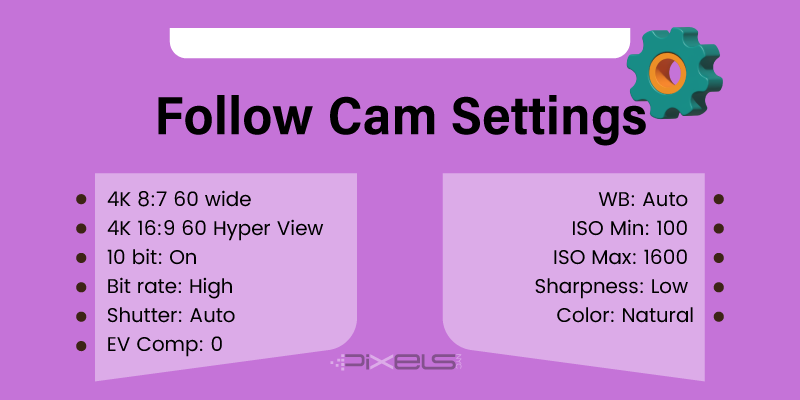
#3. Follow Cam Settings

Here, we come up with another setting. The setting draws the viewer into the scene and helps them to stay engaged throughout the action of MTB riding.
- 4K 8:7 60 wide
- 4K 16:9 60 Hyper View
- 10 bit: On
- Bit rate: High
- Shutter: Auto
- EV Comp: 0
- WB: Auto
- ISO Min: 100
- ISO Max: 1600
- Sharpness: Low
- Color: Natural
Adjust Your GoPro Camera For Your Need For Mountain Biking Adventure
By the way, don’t you think it requires a little more deep down to understand all the settings clearly? Ultimately, if you are willing to take your mountain riding video to the next level, keep reading.
Resolution And Frame Rate
When you have a setting in your GoPro camera, the most important are the resolution and the frame rate settings. In general, the higher the resolution, the better the image quality.
On your GoPro, you can get the absolute results with a resolution of 5.3k. By the way, you can deviate from the 5.3k if you want to take a slow-motion shot or if you’re running through a dark forest.
In low light conditions, 4k resolution has advantages, as it leads to a better image.
So, in summary, in good lighting conditions, you should have 5.3k/ 60, and in low light conditions, it should be 4K/ 30.
On the other hand, if you want to shoot epic slow-motion footage, you will choose a frame rate of 120 frames per second, and reduce the resolution to 4K.
Exposure Value Compensation
Exposure value compensation or EV compensation is how GoPro is underexposed or overexposed to the situations you’re going to face.
In EV comp, the minus value will underexpose every situation, and the plus value will overexpose every situation in a dark spot.
So, what should be your EV comp depends on the situation, as sometimes it can be very sunny, or sometimes you’re hitting in the dark while on the trail.
So, to get the best results while MTB riding for both underexposed and overexposed situations, EV Comp should be slightly negative. For instance –0.5 or -1.
Field of view
Under the lens, you can set the field view. The default field view of the GoPro is Wide. And Wide is a good solution in most cases.
But when mountain biking, you will very often take POV shots. And for the POV shots, a Superview is a better solution.
Color
There can be a lot of discussion about the color in the MTB footage, as a quality MTB video takes a lot to get a good color.
All in all, if you want your mountain riding video out of the box, leave the color to the natural. But if you’re planning to get color grading later, then you can set the color to the Flat settings.
White Balance
On GoPro, white balance comes on Automatic. Well, actually, it doesn’t do a good job and gives horrible results, truly! That’s why you shouldn’t leave it to Auto.
So, what you are going to do is to set the white balance according to the weather, like whether you’re shooting on a cloudy, sunny, or rainy day. Just look at the chart to decide.
How to Choose the Optimal GoPro Settings for Different Terrain Types
We do change the action camera GoPro settings, aiming only at pros. But all the GoPro camera settings are not the same.
Most importantly, which optimal settings you should choose are determined by the lighting, activity, and even the environment the video is going to shoot.
That’s why here we have highlighted the GoPro setting that you can choose for different terrain types.
Hiking
- Resolution: 4K
- Frame Rate: 60fps
- Aspect Ratio: 4:3
- EV: -0.5
- ISO max: 1600
- ISO min: 100
- Shutter Speed: Automatic
Travel
- Resolution: 4K
- Frame Rate: 60fps
- Aspect Ratio: 4:3
- EV: -0.5
- ISO max: 1600
- ISO min: 100
- Shutter Speed: Automatic
Sunset
- Resolution: 5.7K
- Frame Rate: 24fps
- EV: -0.5
- ISO max: 400
- ISO min: 100
- Shutter Speed: Automatic
Surfing
- Resolution: 2.7K
- Frame Rate: 120fps
- EV: -0.5
- ISO max: 1600
- ISO min: 100
- Shutter Speed: Automatic
Underwater
- Resolution: 4K
- Frame Rate: 60fps
- Aspect Ratio: 4:3
- EV: -0.5
- ISO max: 1600
- ISO min: 100
- Shutter Speed: Automatic
Snowboarding And Skiing
- Resolution: 2.7K
- Frame Rate: 120fps
- Aspect Ratio: 4:3
- EV: -0.5
- ISO max: 1600
- ISO min: 100
- Shutter Speed: Automatic
6 Tips For Keeping Your GoPro Safe While Mountain Biking
During mountain biking, capturing with your GoPro, there’s never a dull moment with your exciting two-wheeler, right?
Well, at last, let’s check out some tips that can keep your GoPro camera safe while mountain biking.
- Make use of different mounts.
- When using a chest mount, mount your GoPro upside and down.
- Use stabilizing accessories
- Always have zip ties and duct tape handy
- You can use GoPro smart remote
- Use waterproof housing.