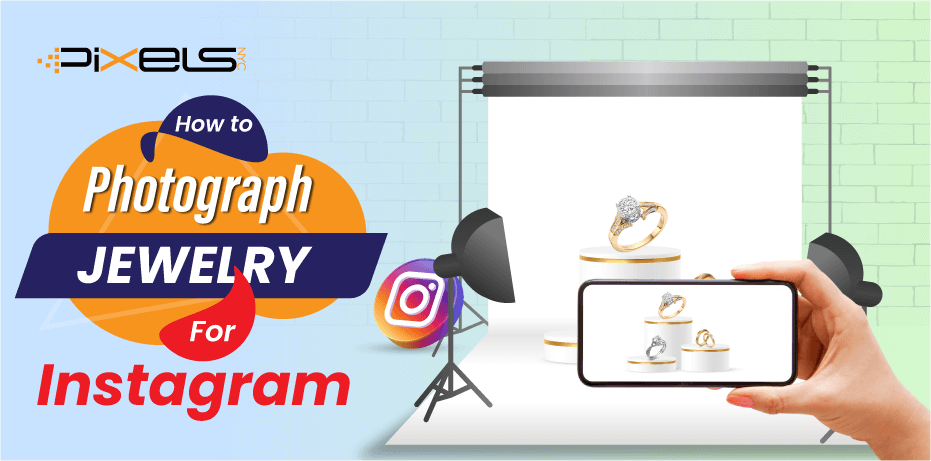
How To Photograph Jewelry For Instagram – Complete Guide
Instagram is a very effective platform to get into the jewelry business. If you want to sell or showcase your jewelry on Instagram, you need a perfect picture of it to draw the audience’s attention. Although photographing such little pieces of jewelry may seem difficult at first, it’s much easier than you think.
You can use either camera or mobile phone to get the best possible shot of your jewelry. This article includes helpful information on How to photograph jewelry for Instagram using a camera or mobile phone. Even if you’ve never taken a jewelry photograph before, you can do so easily by following the simple tips and tricks described below.
How To Photograph Jewelry For Instagram Using A Professional Camera?
Here we are going to discuss the step-by-step guideline for photographing jewelry using a professional camera. The following guidelines will aid you in taking the best photographs of jewelry, allowing you to get the most professional results possible.
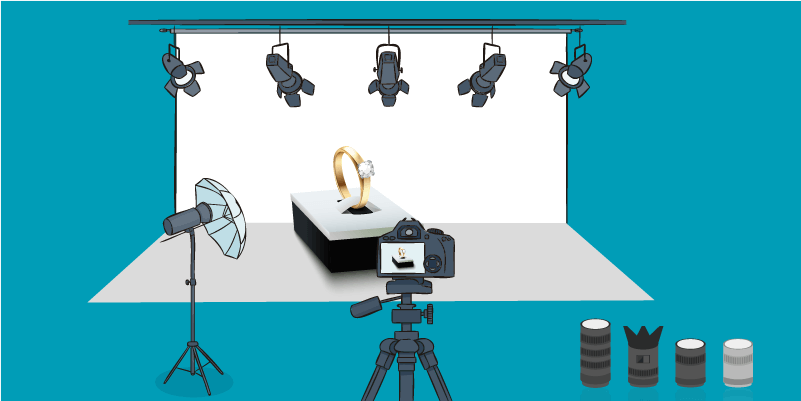
Required Tools
- Camera and Tripod
- White Background
- External light source (like a cluster of LEDs)
- Display case
Step 1: Arrange The Table
First, decide where on the table you want to take the picture. If the windows in the photo site are good lighting sources, position your table such that it is perpendicular to the window.
Position the camera such that it overlooks your setup. If you choose a standard table, you can have adequate space for your jewelry.
Step 2: Gather Light Source
Locate one light source or umbrella at a 45-degree angle to the jewelry. Holding the camera up to the piece of jewelry being shot is the most effective method. You may see shadows if your merchandise is positioned close to the back of the route. Bring the item nearer so that the background is completely white.
Step 3: Prepare The Jewelry
Preparing your jewelry for a photo session entails deciding how to display it.
Consider the following to give your jewelry a more fashionable look:
- Use a display case or ring holder.
- Group your jewels for shots.
- Use a marble or textured slab as a backdrop for your photography.
It’s important to clean your jewelry after each use. You can avoid wasting hours of filming by just wearing some cotton gloves.
Step 4: Get the Camera Ready
Do not take close-up photos of your jewelry with a small aperture. Photos taken with a large aperture and no focusing adjustments will look professional. Also, the viewers will inspect the jewelry in detail. So, shoot at the aperture of f/11 or higher with a low ISO, ideally ISO 100. Make sure your camera’s white balance is set correctly to photograph jewelry correctly. Either use automatic mode carefully or manually tweak it.
Start by mounting the camera so the lens points down at the product. Position lights directly above and to either side of the object angled down at the product and set to the same power. This should evenly light the whole frame without spots. If your camera’s lens is dirty, you won’t get a good shot. If you want your phone’s camera lens to be scratch-free, store it upright and clean it before every photo session.
Step 5: Retouch and Complete
Next, prepare your jewelry photos for Instagram. Post-posting includes image enhancement. If you lack the time or inclination to learn photo editing from scratch, hiring a professional editor is the easiest and most cost-effective option.
If you’d rather do it yourself, you can edit photos online for free. Use basic editing tools to improve your photos for advertising and sales channels.
How To Photograph Jewelry For Instagram Using A Mobile Phone?
If you’re not familiar enough with using a DSLR camera, don’t get worried. Your mobile phone will be sufficient if you know the proper way of taking jewelry photographs. Even a mobile phone allows you to take multiple pictures of the jewelry more quickly than a camera.
See how to take pictures of jewelry with your mobile by following the steps below.
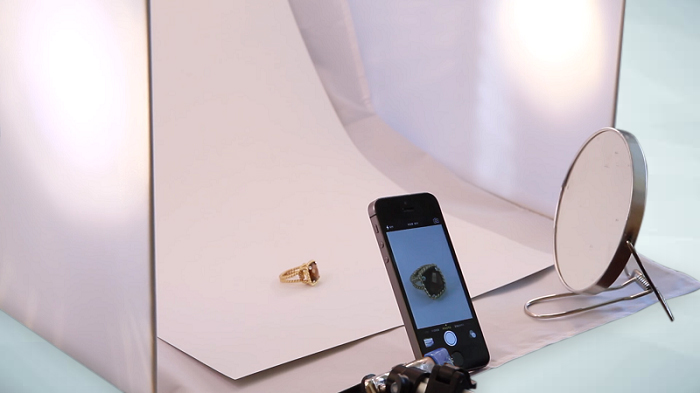
Step 1: Set Up Your Jewelry
The jewelry needs to be laid out on a table so that you can easily snap pictures from a variety of different perspectives. You can put a necklace flat on a table and take a picture from above to get the whole thing in the frame, even the intricate details.
A table or flat surface will prevent you from taking images with skewed angles.
Step 2: Light and Backgrounds
Direct or strong lighting can cast shadows and make the image look worse. Directly shining light on jewelry can improve visibility while viewing it outdoors in bright sunshine. However, the excessive brightness will obscure any details captured by a phone camera. When photographing jewelry, it is best to do so in indirect or natural light.
Try not to make the photo too complex by including too many elements except the jewelry itself. Use basic settings and a simple background, such as a marble surface, for a minimal effect.
Step 3: Setting The Phone
As long as you take the time to set up and focus your phone, it can take stunning pictures of jewelry. Three things should be kept in mind.
- At First
It’s important to remember not to get too near to the subject when taking a picture with your phone, as this will result in a blurry image.
The desire to zoom in on a single subject can be great when shooting a shot from far away. However, you need to stop doing so because it leads to a fuzzy or distorted picture.
The best method is to go back with the phone and crop the image to get closer during post-processing.
- Secondly
You’ll need to tap the phone’s screen precisely when you want it to focus, or else the image will get hazy. Simply tap the region of the screen you wish the phone to focus on, and the camera will adapt while a small square appears quickly on the new focus area.
If the photo still doesn’t turn out how you want it to, try tapping the object again or taking the camera away from shooting and returning to it after a minute.
If your phone still doesn’t focus, you’re probably standing too near to the subject. Leave some space and try tapping it again. This should also modify the exposure settings of your phone’s camera, which controls how bright or dark an image will be.
- Finally
It can be tricky to capture the true beauty of jewelry in a photograph, whether it be the stone, the colors, or the intricate design. For this, a macro lens will do the trick.
Taking pictures of little objects, like jewelry, without a macro lens can make it challenging to get every last detail. You can utilize macro lenses that can attach to your device to give your phone an optical zoom without compromising quality.
Step 4: Don’t Use Flash
Although many believe that utilizing their phone’s flash improves image quality, this is not always the case. Avoid using the flash if you want to capture the genuine beauty of your jewelry’s sparkles and intricate design.
Use only natural light, as previously stated, since it will give your piece more depth and enable viewers to envision the jewelry in actual life.
Beware: Make Sure The Phone Is Not Shaky And Take Multiple Shots
With a shaky phone, you are more likely to shoot a photo with blurry results. A compact portable tripod is an excellent tool for avoiding blurry shots. Moreover, you can’t guarantee that every shot of the jewelry will turn out perfectly, you should take as many shots as possible.
Step 5: Edit Your Photos
Once you have gathered the necessary image, editing is needed. If you want a picture to look great on your website or social media pages, you should tweak it a bit. Photos can be adjusted for brightness, cropped, and rotated on many modern mobile phones.
Moreover, several free photo editing applications have features like cropping, rotating, and applying effects to your photographs (this is great if you want to keep a consistent theme on your Instagram). In addition to VSCO and Pixlr, you can utilize Snapseed, Lightroom, and Afterlight.
Tips For Ideal Jewelry Photography
Consider these jewelry photography tips if you’re starting or want to open your jewelry store.
Use Macro Lens
It is necessary to use a macro lens for the best results while photographing jewelry due to the small objects involved. Even if your product is quite little, you should be able to get it inside the frame with the help of a lens of this sort. Even the smallest macro lenses may produce a 1:0.5 reproduction of a subject, which is remarkable.
Close-up lenses are another option that doesn’t break the bank and can go everywhere with you. Put them in your lens by screwing them in.
Use A Tripod
Using a tripod is the best, simplest, and most reliable way to improve the quality of your images. If you need to shoot many photos for a catalog, this will assist you in keeping your camera level.
Camera shaking may be avoided with a tripod, as well. Slower shutter speeds are typically required when photographing jewelry; therefore, this is a common issue for beginners. This is because you’ll need to utilize tiny apertures to keep everything focused (this will become clearer in a bit).
Choose White Background
Photographing jewelry on a white background sounds boring and unattractive. In contrast, white backgrounds are ideal for product shots and are even required in certain online stores.
It is an effective strategy to make the items more aesthetically appealing to customers interested in purchasing them. Also, the jewelry won’t be affected by the lighting or color of the room because the background is white.
Use Grey Card
White balance is extremely important for accuracy and consistency. To do this, a grey card or color checker is the tool of choice. It’s easy to get a good shot with the grey card if you take the first one and keep shooting normally.
Also, it’s best to snap a new shot of the grey card image after making any necessary adjustments to the lighting. Using the grey card and eyedropper tool in Lightroom, you can get a white balance in keeping with the remainder of the shots you took under the same lighting circumstances.
Use Natural Light To Shoot
For novice photographers, shooting with natural light is far superior to constructing a studio lighting setup. Photographing jewelry is best done in gentle light to prevent harsh shadows and reflections. Using light modifiers like diffusers is a terrific method to soften the light. A light tent works just as well for this purpose.
Careful With The Reflection
Due to their great reflectivity, metals can be hard to focus on and photograph. When there is a photograph reflection, the result might resemble a flow and give the impression of low-quality images. Avoiding reflection requires careful consideration of the camera’s position, the scene’s backdrop, and the lighting supports, among other factors.
Use Props To Position The Jewelry
Whatever you want in the shot, make sure it’s simple to remove or doesn’t detract from the main subject.
Photos of long earrings, pendants, necklaces, etc., should show the item hanging in midair rather than lying flat. Display busts designed specifically for jewelry are an excellent choice for this task. White cardboard can be used as a more affordable substitute. It has slots that can be carved out to accommodate various jewelry, such as earring posts or a necklace clasp.
Use a clear string to suspend any jewelry that is still in manufacturing. Hang the necklace or bracelet from it by placing one end on each side of the picture frame.
Use Different Angles To Shoot
Photographing from several perspectives offers the buyer a more accurate representation of the item’s appearance. Take pictures from different angles so the buyer can fully appreciate your item. If there are distinctive inscriptions or decorations, please submit images taken from a close range of them.
Do Post-Processing
Retouching is crucial for any product photo used for marketing purposes. For instance, if you’ve shot in RAW format, you may correct issues like improper white balance with a single click in your picture editing software.
The final step is to fix any misleading flaws such as smudges, scratches, reflections, etc. The final product must look just as wonderful in the picture as it does to the consumer when they have it in their own house.
FAQs
How do you take pictures of jewelry without reflection?
Cleaning your camera’s lens is essential for taking clear images of jewelry, and you may keep dust off your lens by covering it in paper or aluminum foil. By taking these measures, you can keep the focus of your jewelry photography shoot where it belongs: on the jewels and not on distracting reflections. Avoid applying flash, too.
How do you get jewelry to sparkle in photos?
The methods required to make jewelry sparkle in photographs are:
- Use an external light source (cluster of LEDs).
- Find the optimal balance between the intense and subdued nature of the lighting.
- Sparkler lights can give jewelry a dazzling, blinking effect.
- Use only a few light sources at a time.
Final Verdict
Having prior experience or knowledge is essential for Jewelry photography. Avoiding fingerprints, light control, creating the desired effect, and adjusting shutter speed and aperture can all be confusing at a time. After following the advice shown above, hope you now have no trouble with How to photograph jewelry for Instagram. You probably have the majority of the necessary props in your house, so stop fretting and start shooting.
It is, of course, up to you how lavish your jewelry picture shoot gets. Achieving cost efficiency is possible if you follow the suggestions above. The alternative is to shell out more premium gear, such as lighting or jewelry displays.